You may remember our exploits in the garden last year. I covered that in the post It’ll only take 5 minutes. Well, we never learn. You see, when I wrote that post we did think we’d do “something” with the side garden but that was more along the lines of clearing it of weeds, levelling it, and then perhaps cover it in decorative gravel. So, we thought we’d decide and plan it over the winter and then tackled it this year.
THE GARDENER
Some things didn’t really go to plan.
In May last year we arranged for a gardener to come round and clear all the weeds, fruit bushes, rosa rugosa, grass, long lost shrubs, and flatted the spoil heap of soil we’d built up over the years, ready for us to start our redesign this year. Well, we waited, ‘I’ll be at the end of the month’, two months later turned into ‘I haven’t forgotten you, I’ll be round in 2 – 3 weeks time’, turned into ….. well …… nothing …………. still waiting.
By the end of the summer we decided, we could just tackle it ourselves. Amazing what you can do with a couple of spades, a fork and a rake. The rosa rugosa roots were massive, and there were runners speading out all over the area. No mercy was given on either side, but we were a force to be reckoned with and out they came!
THE FENCE – I MUST LOSE SOME WEIGHT
We had planned replacing the fence but thought we would let the old one get through another winter and then replace it. Well, that didn’t run to plan either. During our path laying last year I leaned on the fence, and it moved… a lot. I didn’t realise I needed to lose weight, or was it my newly honed muscles. There was no way that it would weather another Highland winter so after 27 years marking the border of the garden, we got it replaced.
The fencing contractor was great. He came when he said he would, and replaced the fence at break-neck speed, and even removed our old ‘hole in the roof shed’. However, the fence was 140+ meters long, so that meant a lot of fence to paint (280+ meters as we had to do inside and outside). We got most of it painted, but unfortunately the winter came quicker than we expected.
WHEN IS SPRING COMING?
I don’t think we expected such a long cold winter and spring was really late coming this year, so it was well into April before it was warm enough to finish painting the fence. Then, we lifted the membrane and started lowering and levelling the garden.
LEVELLING THE GARDEN
Firstly, we had to get the level from the front gate down to the level of the existing patio correct as we didn’t want to put in any steps. Also, we had to get the patio reasonably level with just a very small slope for drainage. So out came the string lines – oh, yes, a beautiful trip hazard – still, it let both of us practice our very unattractive ballet leaps, in steel toe capped wellies. A sight to behold.
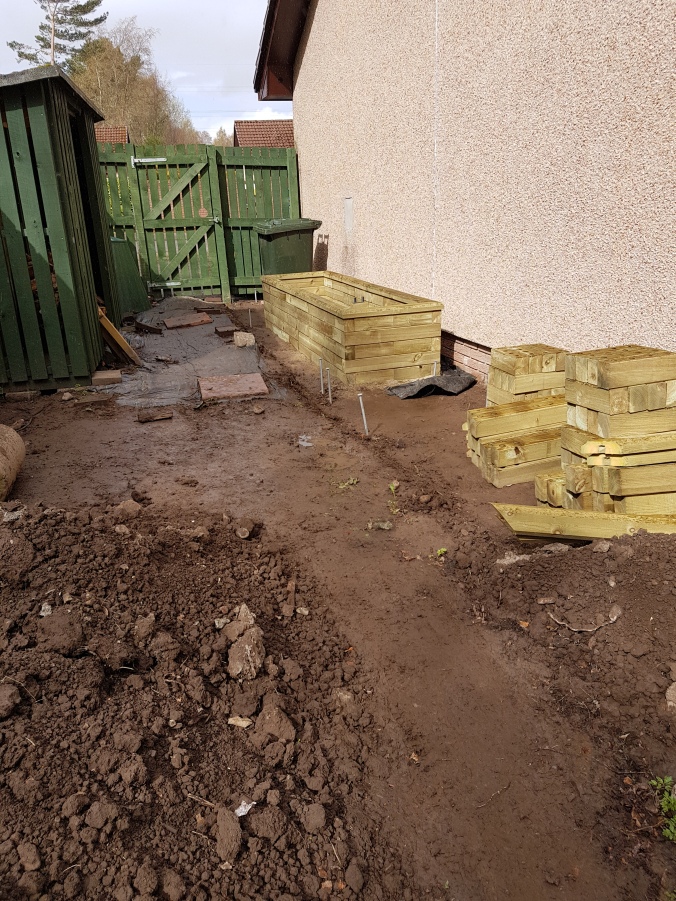
PREPPING FOR THE WOODBLOCX
Over the winter we decided on 3 raised beds – one for vegetables, one for wildflowers and the other for flowers. The Woodblocx arrived and the first tub went together really easily. That then gave us a store for some of the soil that was to come out of the patio area.
PLAN, PLAN, PLAN
Nice and easy producing a plan. But there’s always something that will be a spanner in the works. I guess the next bit of the garden was the bit that we were most undecided about. Would we have an arch to mark moving from the relaxing patio area to the productive work area of the garden? Then, the next question was, could we find one that would fit? We were quite tight for space, so the dimensions would have to be accurate.
Search as we did, both online and at the chain DIY stores, we couldn’t find one that had the perfect dimensions. So, the next option? Perhaps we could leave this bit out, and then put one in when we found one that was the correct size.
THE ARCH
One thing one of our local garden centres has is a brilliant restaurant. So up we went for a coffee, and what did we see? An arch! Exactly the size we needed, the look we wanted and cheaper than the diy stores. So a few days later it was delivered, along with the metal spikes we were going to use to stand it in.
THANK GOODNESS WE DID IT NOW
I guess we didn’t really think too much about it, but, despite being in the house for over 27 years, we hadn’t really worked this soil. So we started to hammer in the spikes, only to hit something hard. So, the fork came out, the spade was used too but no, nothing was getting past. Then the crow bar came out – that sorted it. A layer of tar. Gradually we broke through it but in the process decided that really we’d have to dig down and try to get all the rubble out. Oh, all the builders rubbish was there, oily cloths, tar, boulders, concrete all had to be removed.
We did realise early on in this process, that we would have to make sure that all 4 of the spikes were positioned millimetre perfect. In the end, due to all the builders rubbish we ended up having to dig out holes for 3 of the spikes, the remaining one sunk into the soil beautifully. Then the moment of truth. We lugged the arch from our existing patio, where we’d built it, round to the spikes, and lifted it into place. Would it fit? Like a glove. So, we backfilled the holes and tightened up the screws in the arch.

THE TRELLIS & RAISED FLOWER BEDS
By this time, we decided that we wanted to put a trellis behind each of the flower tubs – which would let me grow one of my favourite climbing flowers, sweet peas. Knowing that we had so much hassle with the spikes for the arch we decided to sink the spikes for the trellis work at this stage, and to position the posts for the trellis. Yes, more tar, more builders rubbish, but finally, with all that completed we could build the two remaining raised beds, fill them, and then fit the trellis. Our final job at this stage was to fit wooden edging to the path and backfill with soil to give a flat surface.
Looking back, it was just as well we found the arch as there was no way we could have retro fitted it.
CLEARING FOR A PATIO
As you’ll probably have guessed by now, we have loads of soil that we’ve dug out. Some we used to fill the raised beds but there’s still tonnes of the stuff.
So, back to the fork and rake to get the patio dug out. If you read the previous blog from last year you’ll know that we redid a couple of paths. At that time we decided that if we had enough soil we would use it to fill in a couple of areas in the back garden that needed raising and finishing. So a lot of the soil was wheelbarrowed round to those areas. We still had a lot left, but thought that as the shed had been removed we could work on this area later and use the soil there.
SLABBING
We had drafted a plan for slabbing the patio and paths over the winter. However, we then decided to change them to incorporate different sizes of slab and finally came up with a design we liked.

The patio slabs being delivered
The next stage was slabbing the area. As you’ll see from the photos the area between the arch and the gate is very much our working area. We’ve the wood store, the vegetable raised bed and the wheelie bin area. So that was the first area to be slabbed.
Next was the patio. We knew this was going to be a challenge as there are so many different angles and levels in the garden. After a few trips over the string level we got the correct angles and set to laying the patio. We always knew there was going to be a tight spot at the hedge as we had just enough room to fit a slab in there – and phew! it worked, I don’t think we had more than 1mm to spare.
THE PATHIO
Once the patio was complete then it was onto the pathio. This was the area that linked the new patio with the existing patio. When we started building that we realised it was almost a small patio in its own right, and was almost too wide to be called a path. Hence the new word – pathio.
So joining the new and existing patios was always going to be a close shave. Remember, we had to match the correct height and angle with the existing patio. Relief – all the trips over the string line were (nearly) worth it – it fitted.
ANOTHER RAISED BED!
I’ve mentioned it a few times – we have a lot of soil. It was becoming more and more apparent that the area between the pathio and the fence was going to be another raised bed. So, back to digging and raking. Eventually we managed to level the area but there was going to be a slope and it was going to be too steep for the decorative gravel. A quick look around the garden and we decided to re-use some more of the granite setts that we’ve had lying around.
A WEE BIT ABOUT THE SETTS
A year or too after we moved into the house a builder decided to “fly tip” builders rubble further up the track from us. In those days it wasn’t illegal to do that. But, one of the many trips was to dump off some really lovely old granite setts. It was quite funny, as soon as the lorry left, everyone in the area were out with their wheel barrows and rescued the setts. Now, if you walk round the village you will see lots of features made up of these lovely setts.
THE GARDENER – REPRISE
Remember earlier I mentioned a gardener, who last May, said he’d be at the end of the month? Well you’ll never believe this, but on the 31 May this year, he arrived. Still, it gave us a chance to show him what we’d been up to.
BE NICE TO THE WILDLIFE
We knew we had quite a lot of wildlife visiting our garden, but we didn’t realise just how many different species paid us a visit. We ended up becoming trusted by one of the blackbirds, who has become increasingly bold in coming up really close to us. We also tried to build in escape routes between the fence and the gravel by adding in concrete lintels a few centimetres from the fence – this will allow the hedgehogs to transit through the garden. In the final stages we found another visitor – a common frog. He’d found a wee hidey hole under the membrane within the centre of one of the plants.
THE FINAL PRODUCT

Delivering one of the 5 bags of decorative gravel
At the start of June the 5 bulk bags of decorative gravel arrived for the raised flower bed. So, it was many trips with our barrow, but finally, all the area was covered.
As with all gardens this will continue being a work in progress as I already have cuttings in tubs which I hope will be big enough next year to plant round the edges of the raised beds to help soften them.
Just a wee reminder of before and after:
So, things I learned during the process:
- Always plan what you want to achieve
- Calculate what you need
- Shop around – I’d have never got the arch I really wanted if I hadn’t
- Don’t assume the chain stores will be cheaper – both the arch and the gravel were a lot cheaper from the garden centre
- Tackle each part as a mini project in its own right
- Set realistic goals
- Make sure you take breaks – or you’ll just get scunnered
- If you think something will be better, deviate slightly from the plan – we hadn’t thought of the wood logging but it really added a finishing touch
- Logistics – we kept the impetus going by making sure materials were going to be delivered when we needed them – that gave us a target to aim for in finishing off an existing mini-project
- Alter the plan if you need to – you may end up with something better

Pingback: Great Plans for the Pond | AlternativePerspectives